
Your first day in ten minutes
This is the whole morning routine, one screen at a time. Each step links to the page with the details. If you used Paragon, the glossary maps its words to Routisserie's.
The dispatcher's day
Steps 3 to 5 can be repeated as often as you like until you publish. After publishing, every change reaches the drivers at once.
1. Sign in
Open routisserie.com and click Client login, or go straight to https://app.routisserie.com/login. Bookmark it.
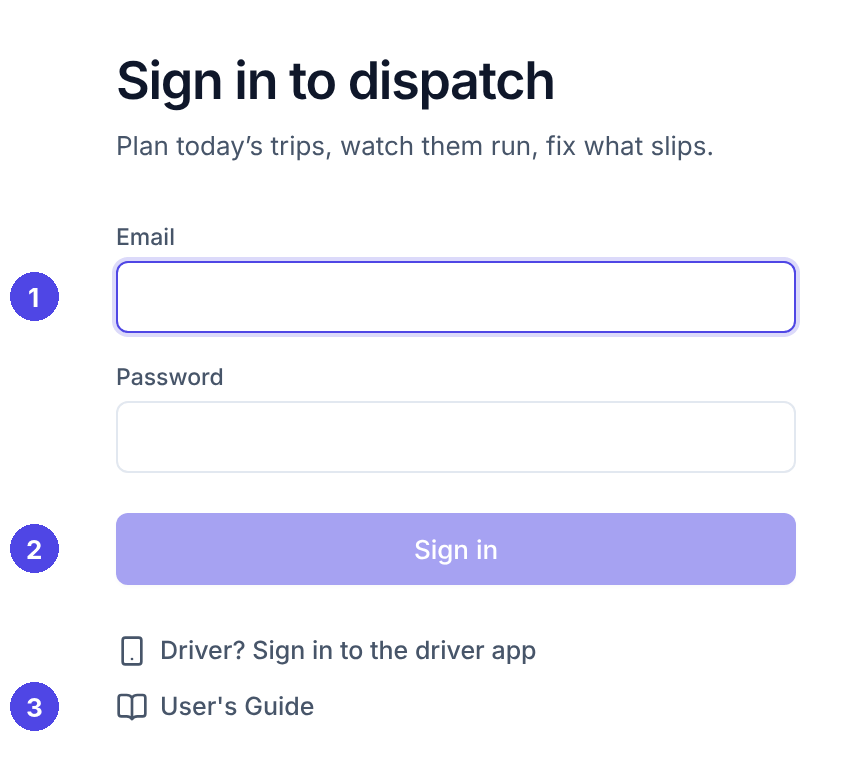
Type your email and password and click Sign in. If you forget your password, ask the office manager: only an admin can set a new one.
Drivers do not sign in here. They use the driver app, see the Driver quick start.
2. Pick the day
You land on the plan board for today. The day you work on is at the top left. Use the arrows (or ← and →) to go to another day, click the date to pick one from a calendar, and Today (or T) to come back.
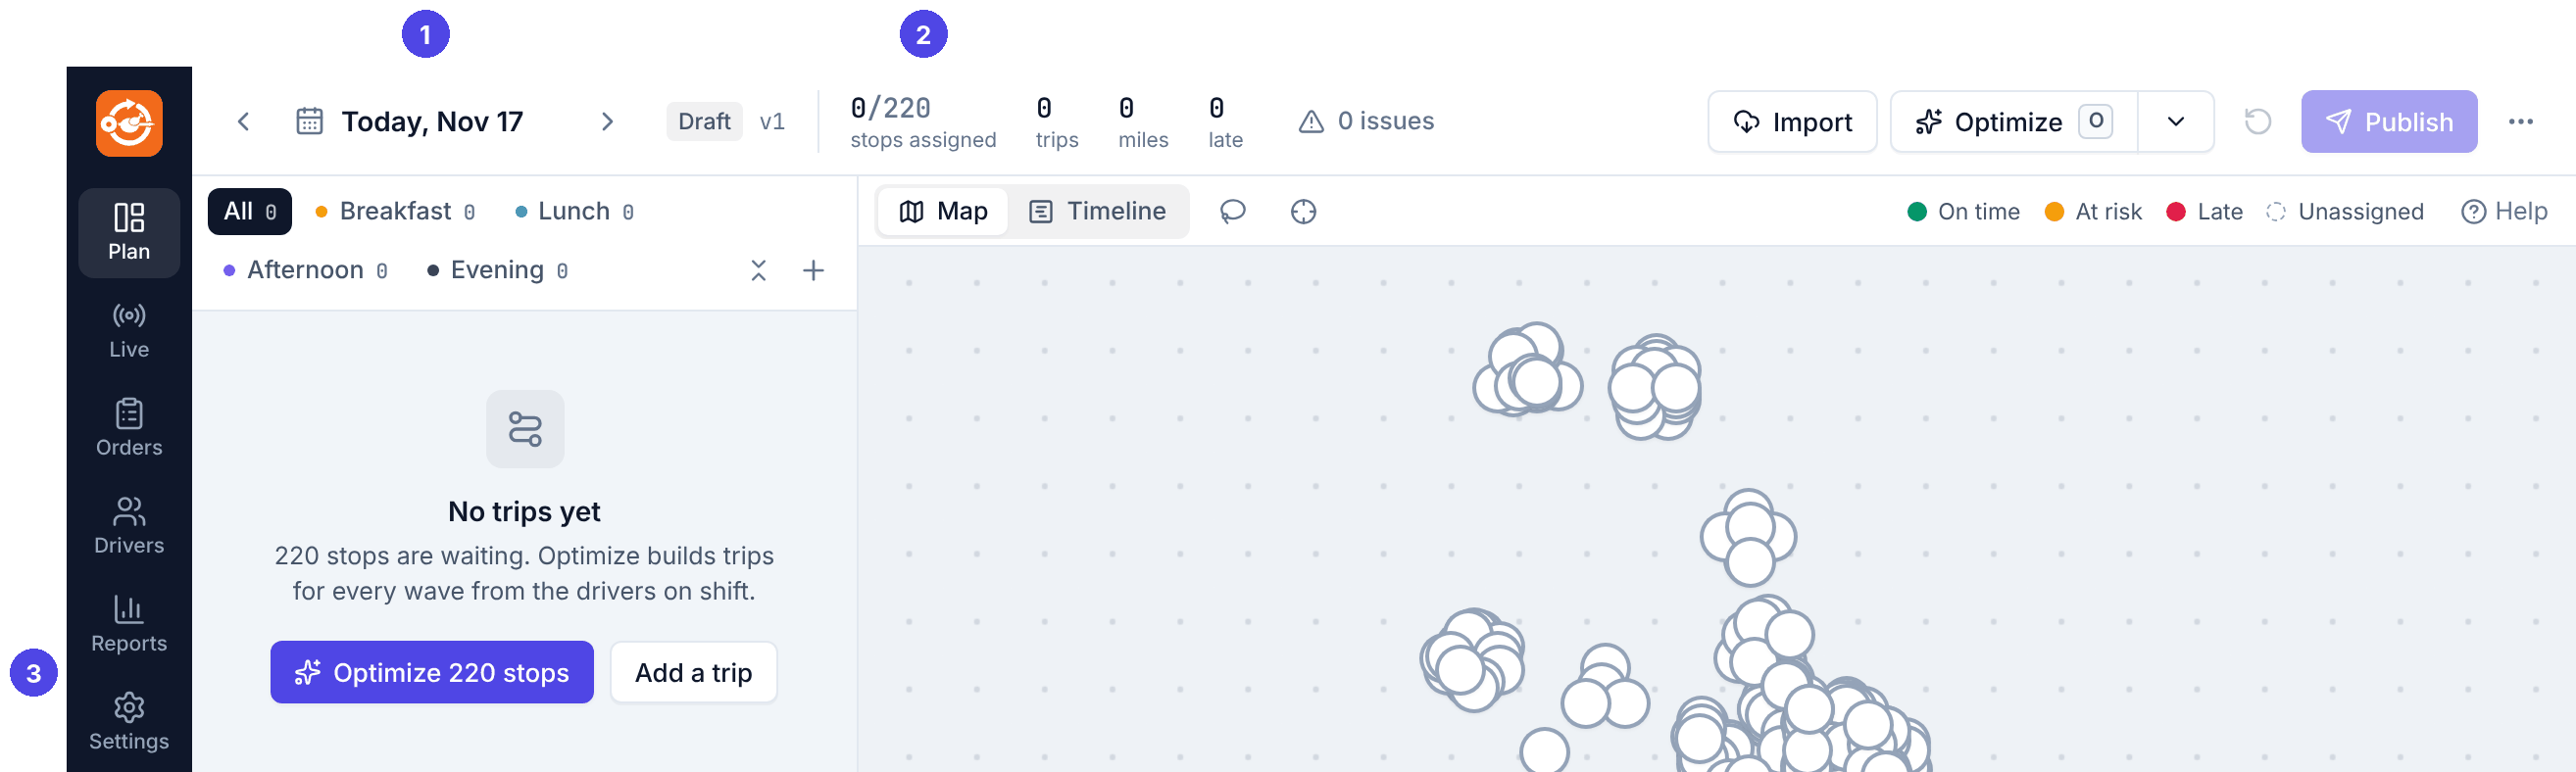
The numbers next to the date tell you where the day stands: stops assigned out of all stops, trips, miles, late stops and the estimated cost.
3. Import the orders
If orders are already there (NetSuite can import them automatically), skip this step.
Click Import at the top right:
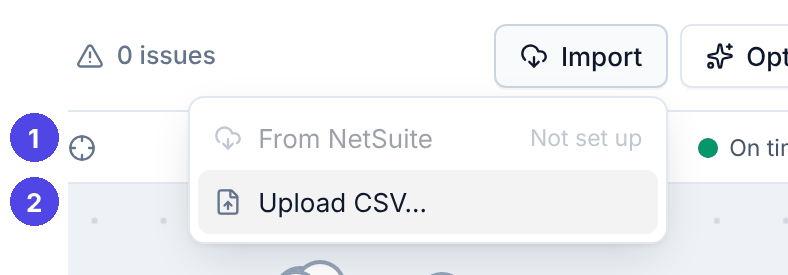
- From NetSuite loads every sales order for the day shown.
- Upload CSV… takes a spreadsheet export. Click Download template in that window for the columns.
A summary tells you how many orders are new, updated, cancelled, failed, and how many need a pin (the address could not be found on the map). More in Orders.
4. Check the roster
Click Drivers in the left-hand bar. The Shift roster shows who works on the day, their hours and their vehicle.
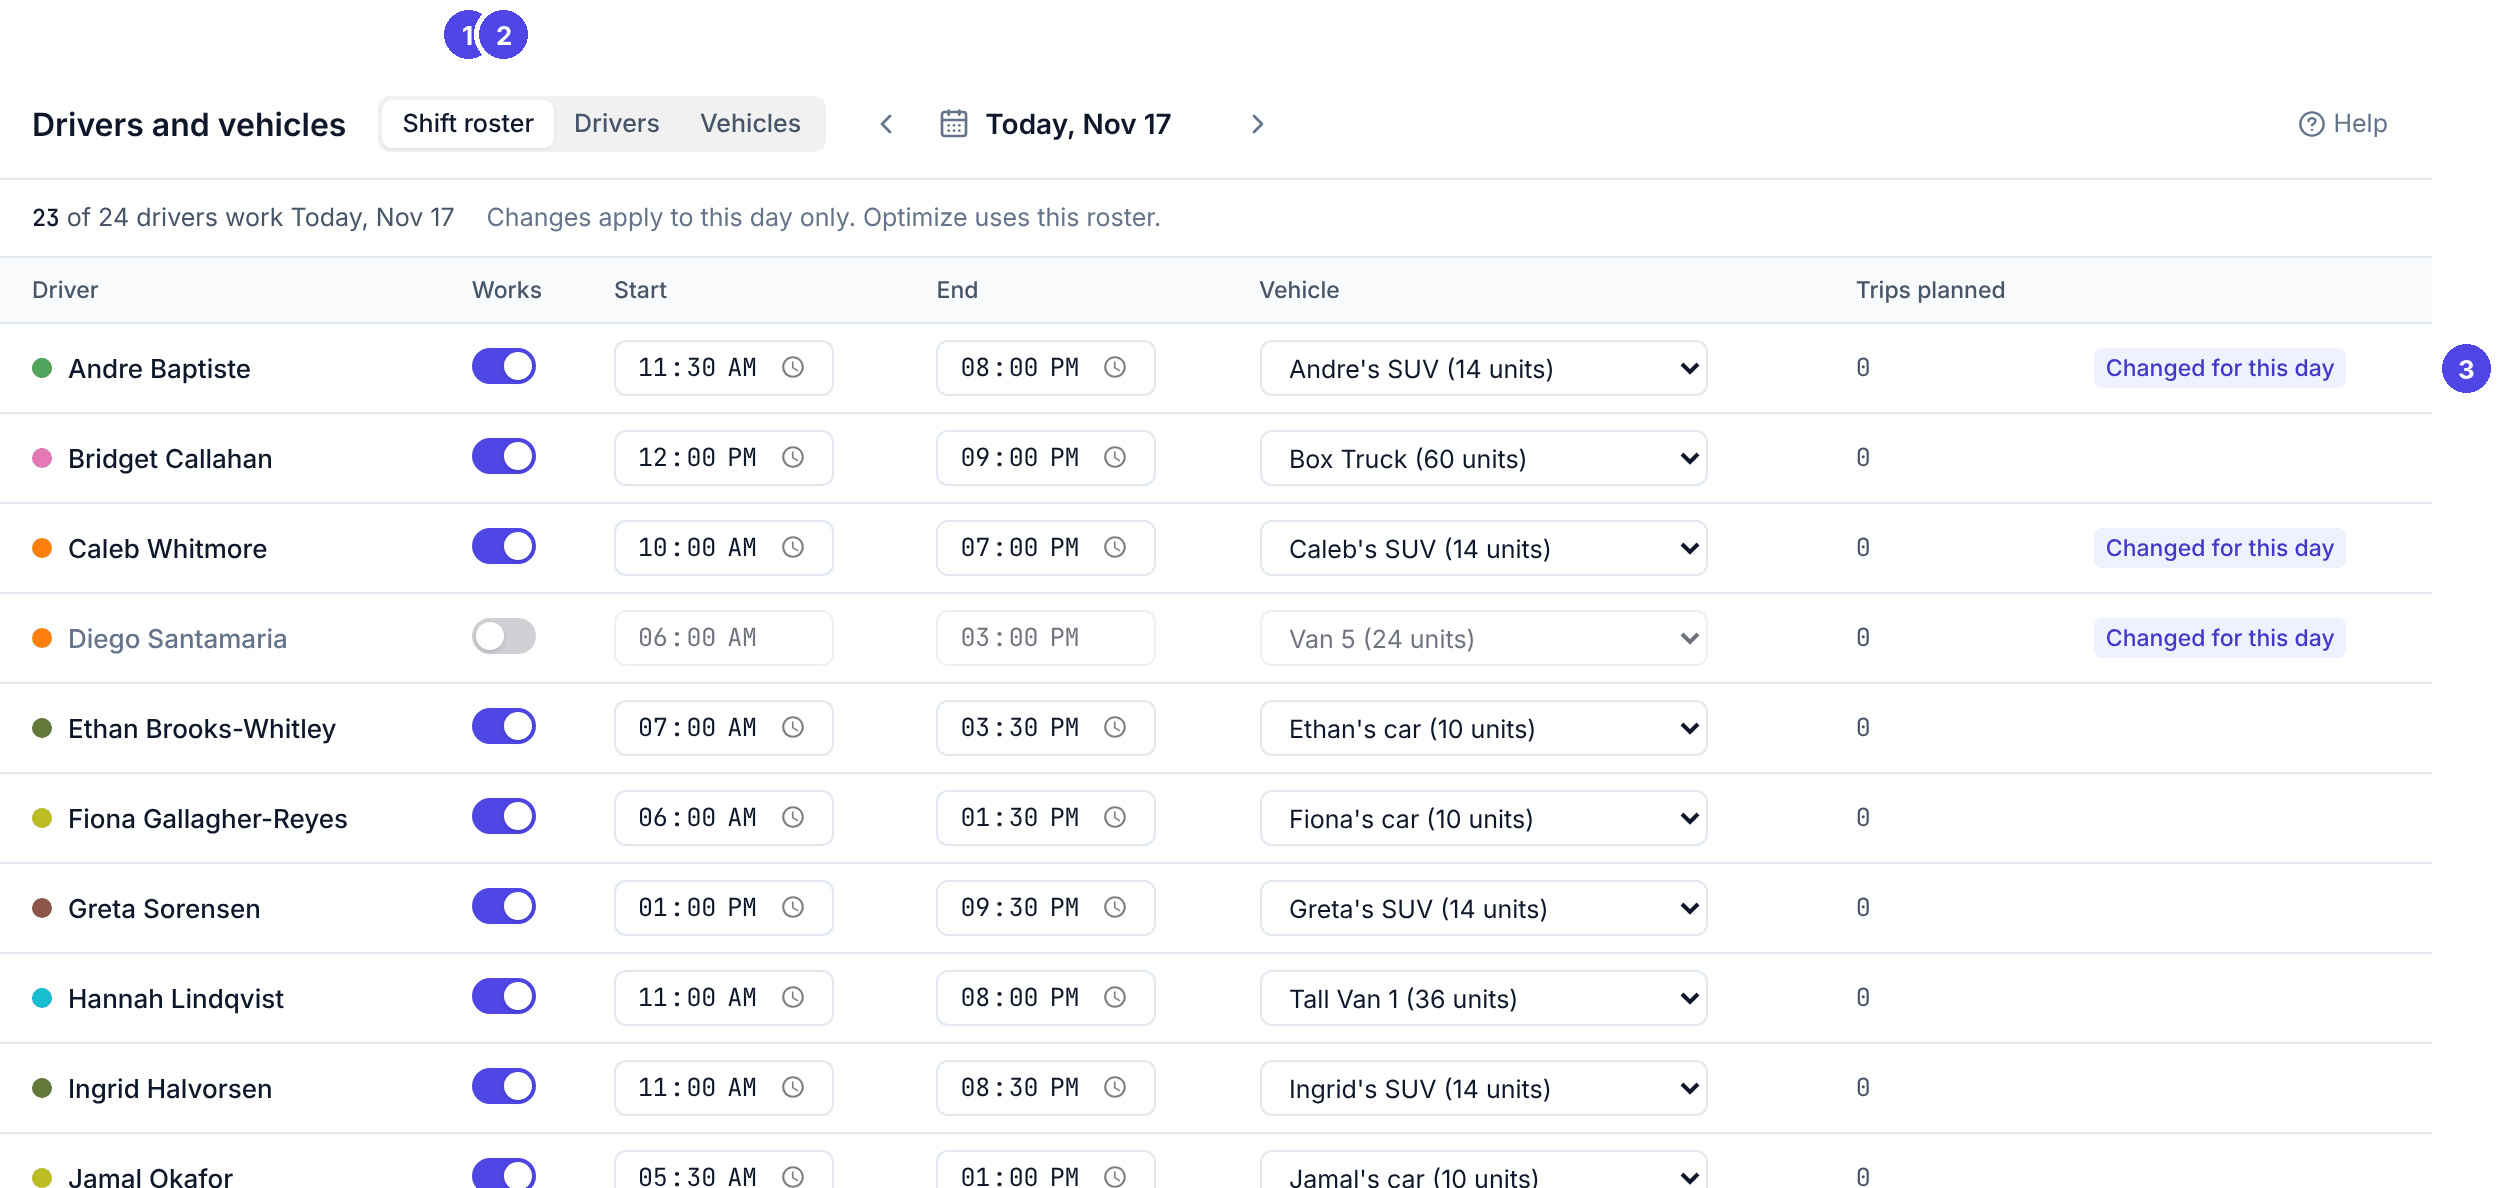
Turn off Works for anyone who is off, fix hours that differ, and change a vehicle if one is in the shop. These changes are for this day only. Optimize uses exactly this list. Details: Roster, drivers and vehicles.
5. Optimize
Go back to Plan and click Optimize (or press O). A full day takes a few seconds.
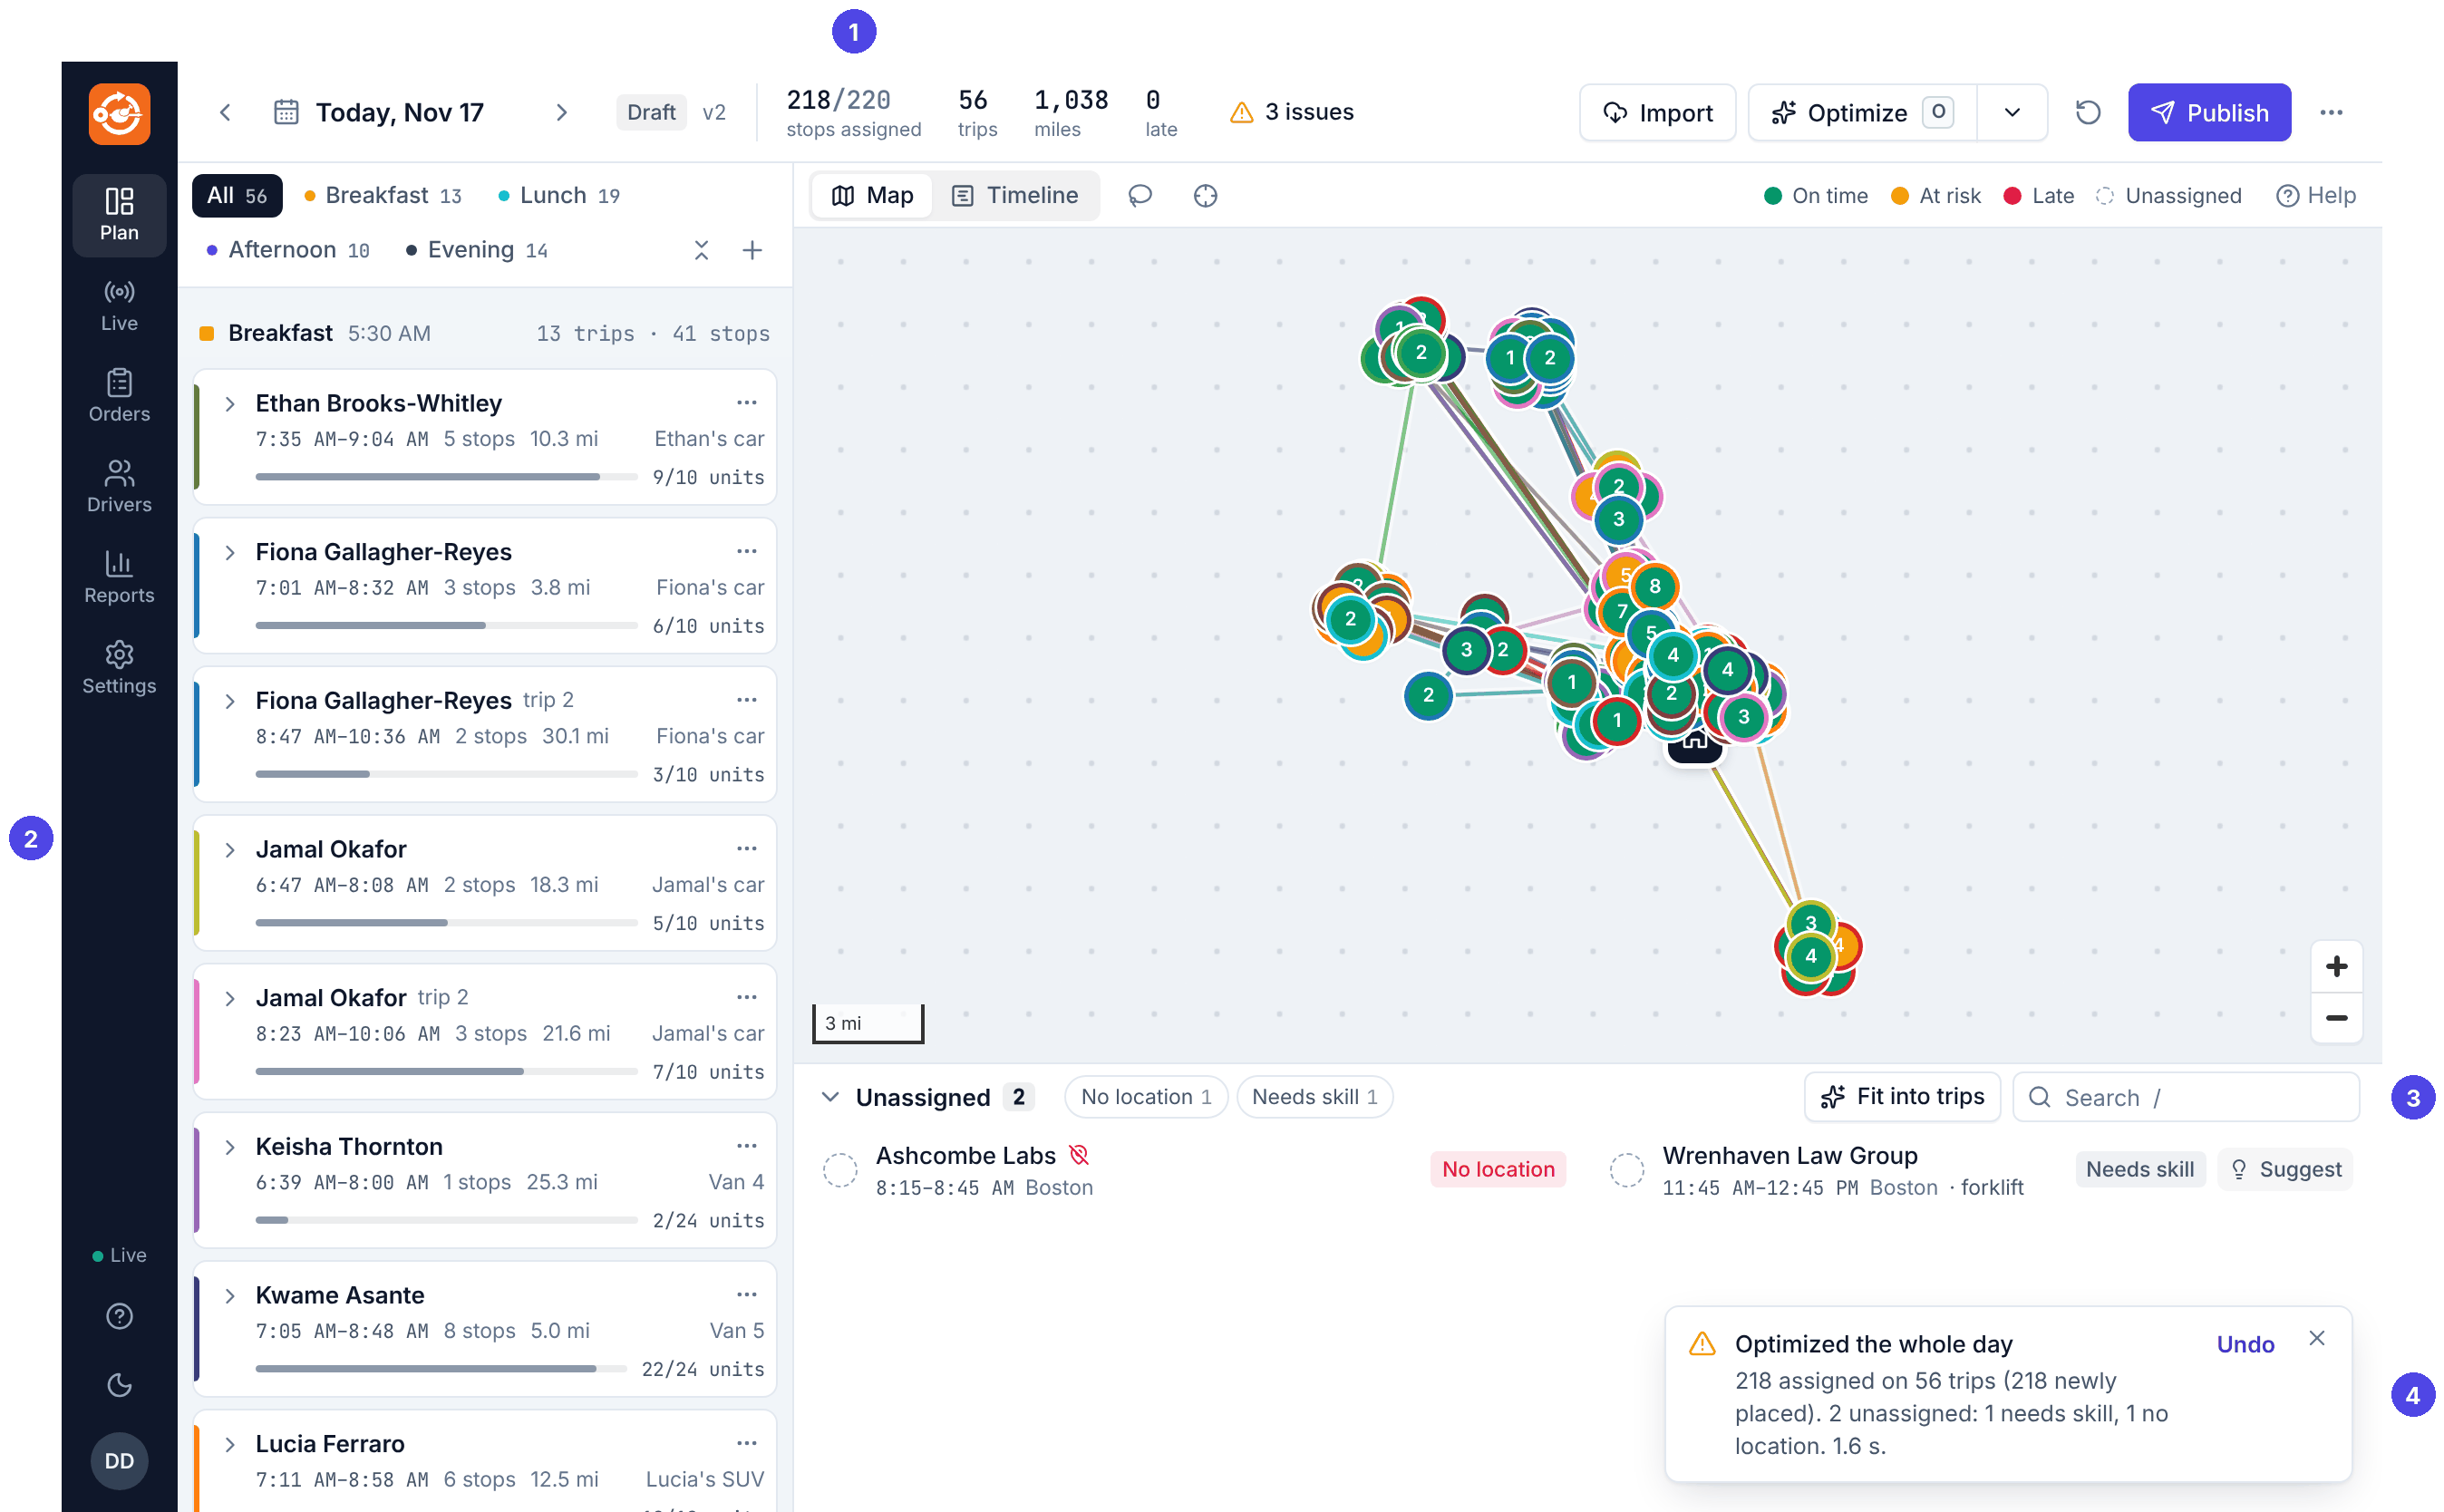
Routisserie builds trips for every wave (Breakfast, Lunch, Afternoon, Evening) from the drivers on the roster: who goes where, in what order, and when they leave. The message says how many stops it placed and why any are left over. Read What Optimize does once; it explains what it can and cannot know.
6. Read the board
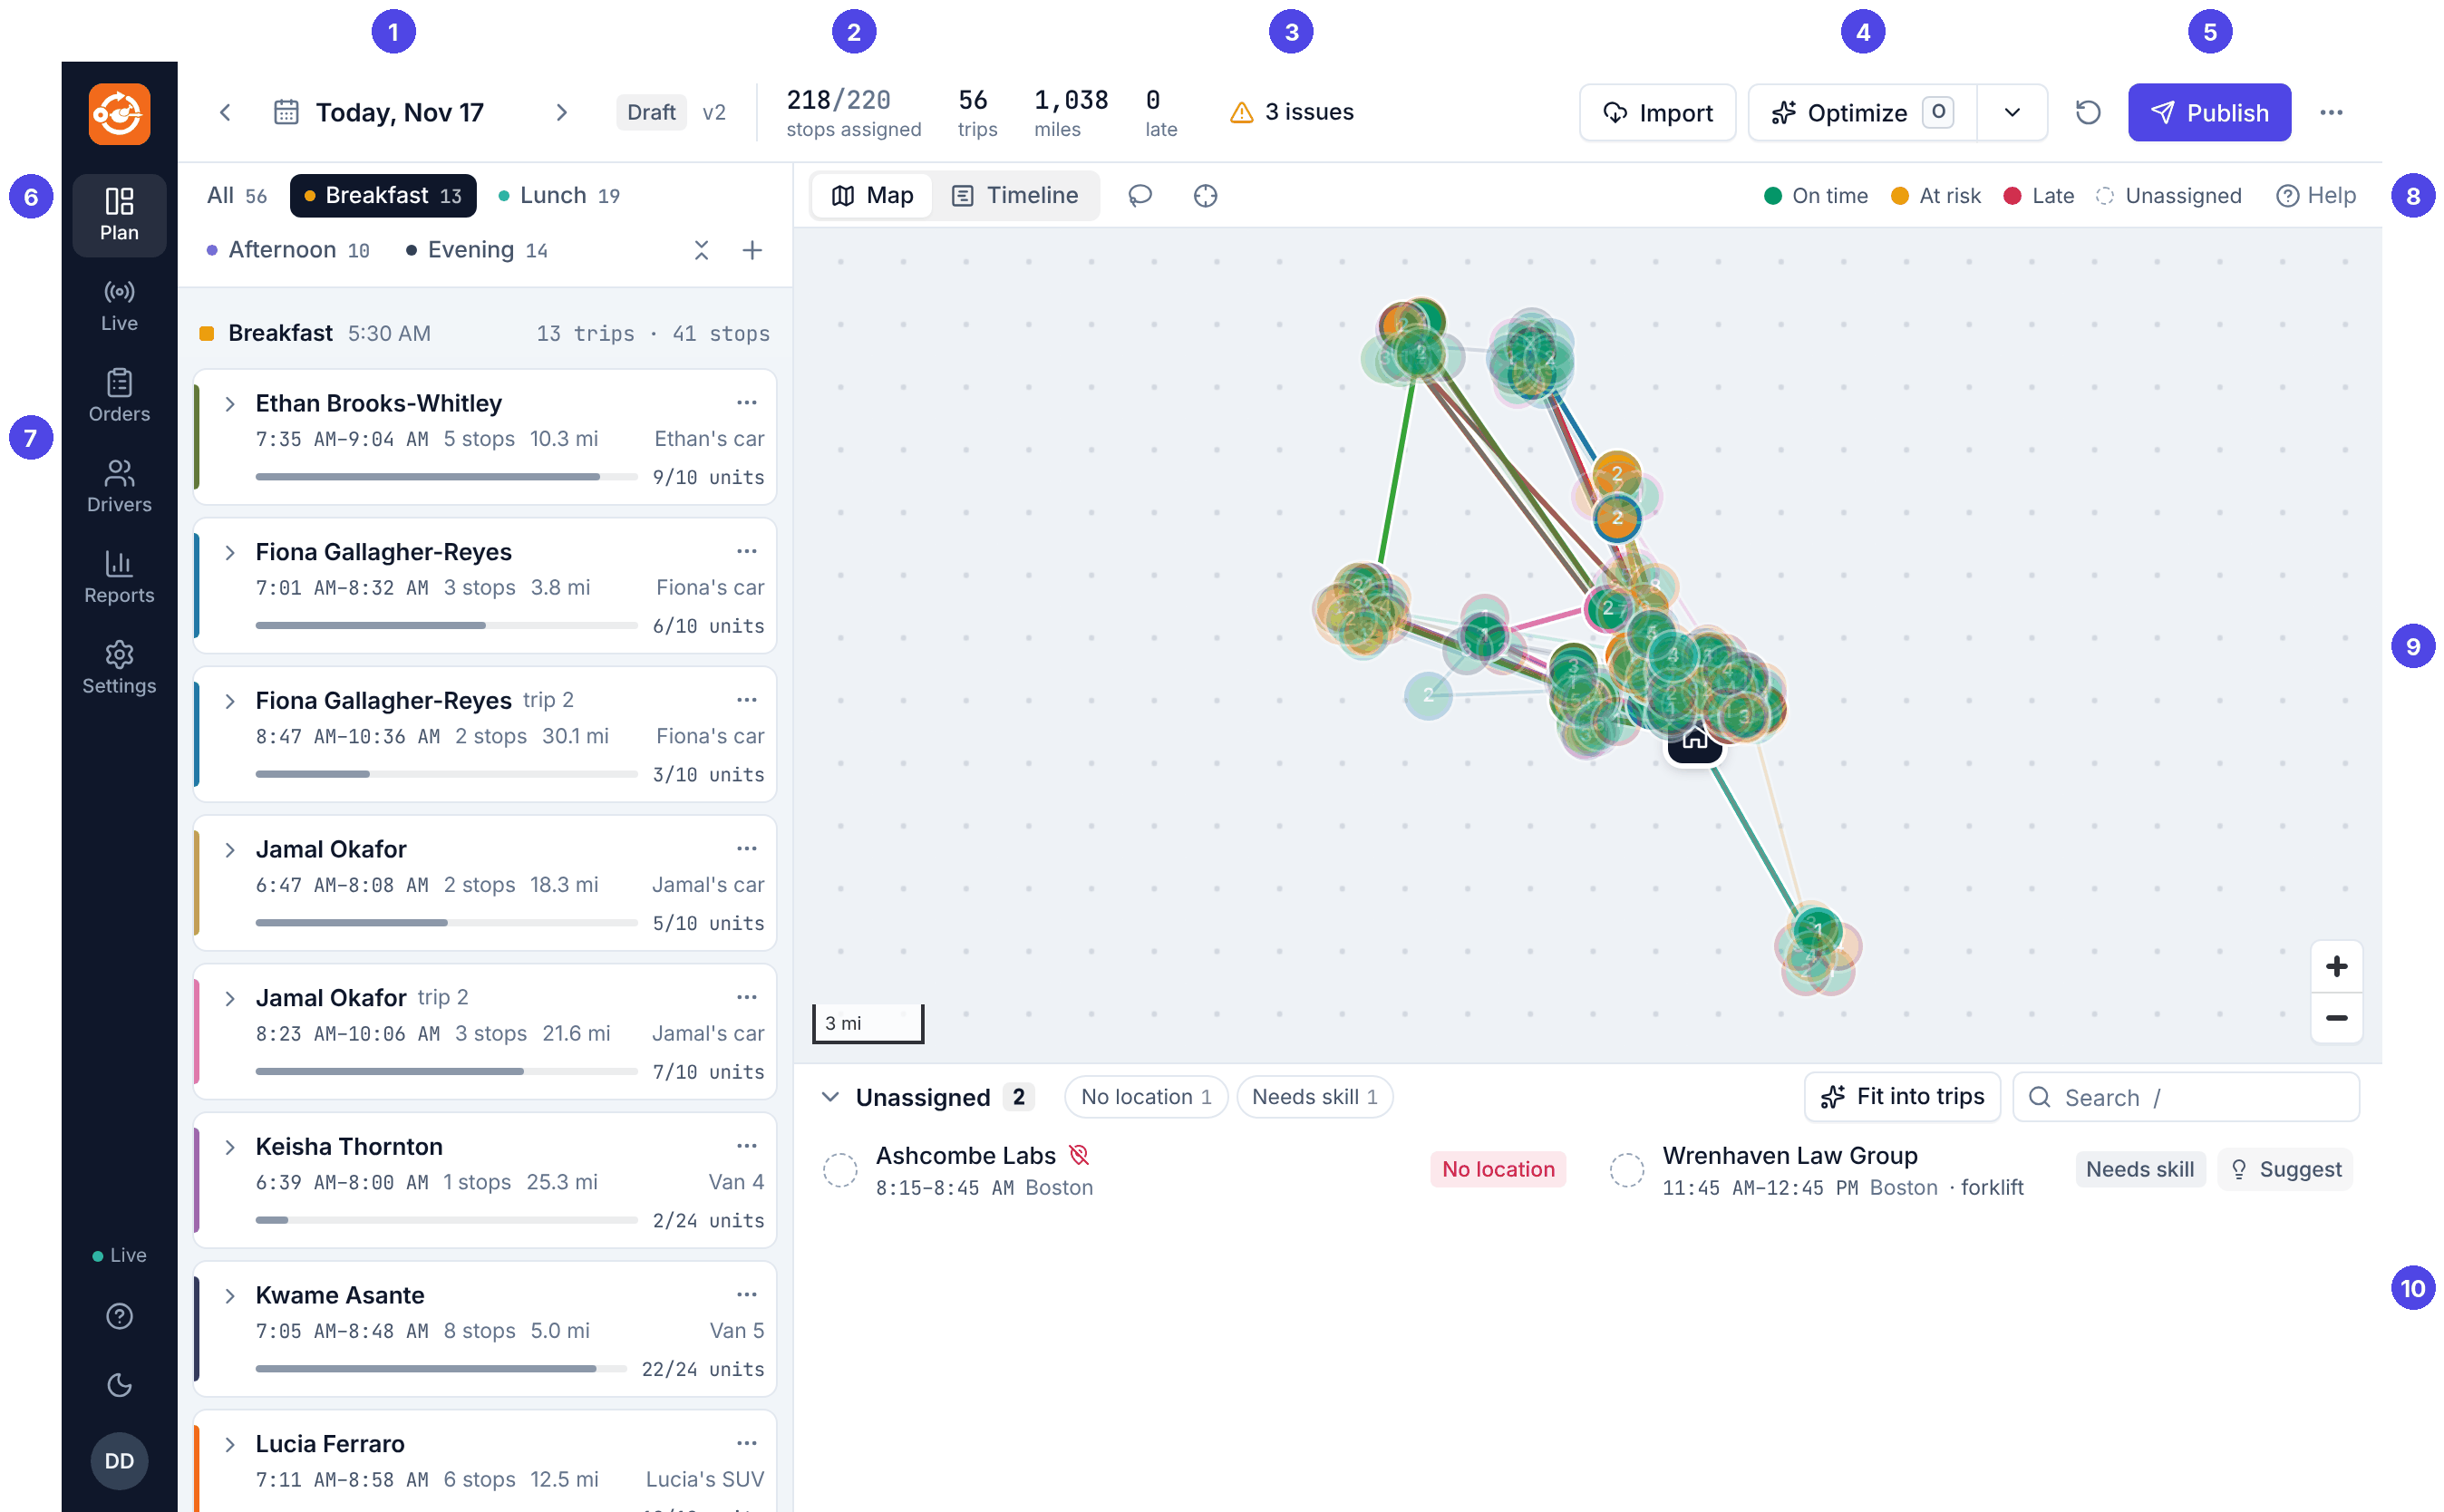
- The day and the plan's status (Draft until you publish).
- Totals for the day.
- Issues: problems on the plan. Click to see the list.
- Optimize, with more choices under the small arrow.
- Publish.
- Waves. Click one to see only its trips.
- A trip: one driver going out from the kitchen and back. Click the arrow to see its stops.
- Switch between Map and Timeline (V).
- The map. Colours tell you if a stop is on time: see Colors and status.
- Unassigned: stops on no trip, each with its reason.
7. Fix what is flagged
Look at three things, in this order:
- Unassigned stops. Each has a reason chip (No location, Needs skill, No capacity…). Fix the cause, or click Suggest to see where the stop could go and click a line to put it there. See Optimizing and unassigned stops.
- Issues. Click N issues for the list (late stops, over capacity, long rides, double-booked vehicles). Click one to jump to it.
- Red and amber markers. red is late, amber is at risk. Drag stops between trips, or lock a trip you are happy with and optimize again.
Every change can be undone with the undo arrow next to Publish (or Z). How to move stops: Changing trips by hand.
8. Publish
When the plan looks right, click Publish. Routisserie tells you what will happen, including stops that are still unassigned or late:
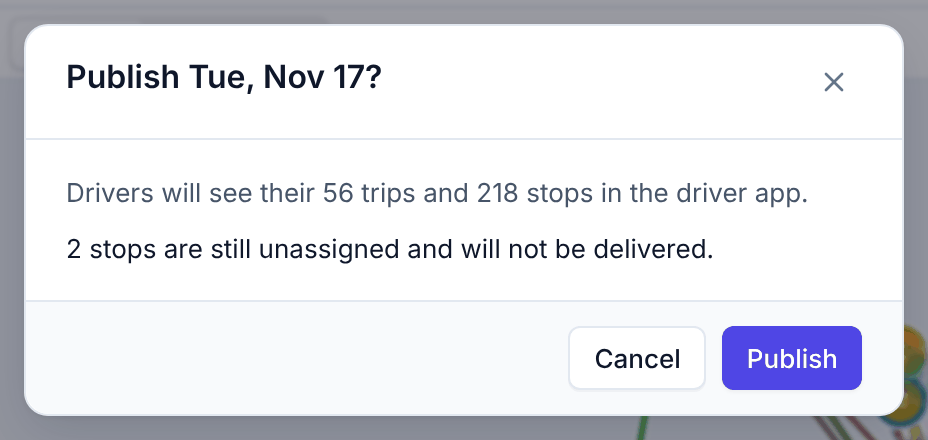
Click Publish again to confirm. Drivers now see their trips in the driver app, and when NetSuite is connected the assignments are written to each sales order.
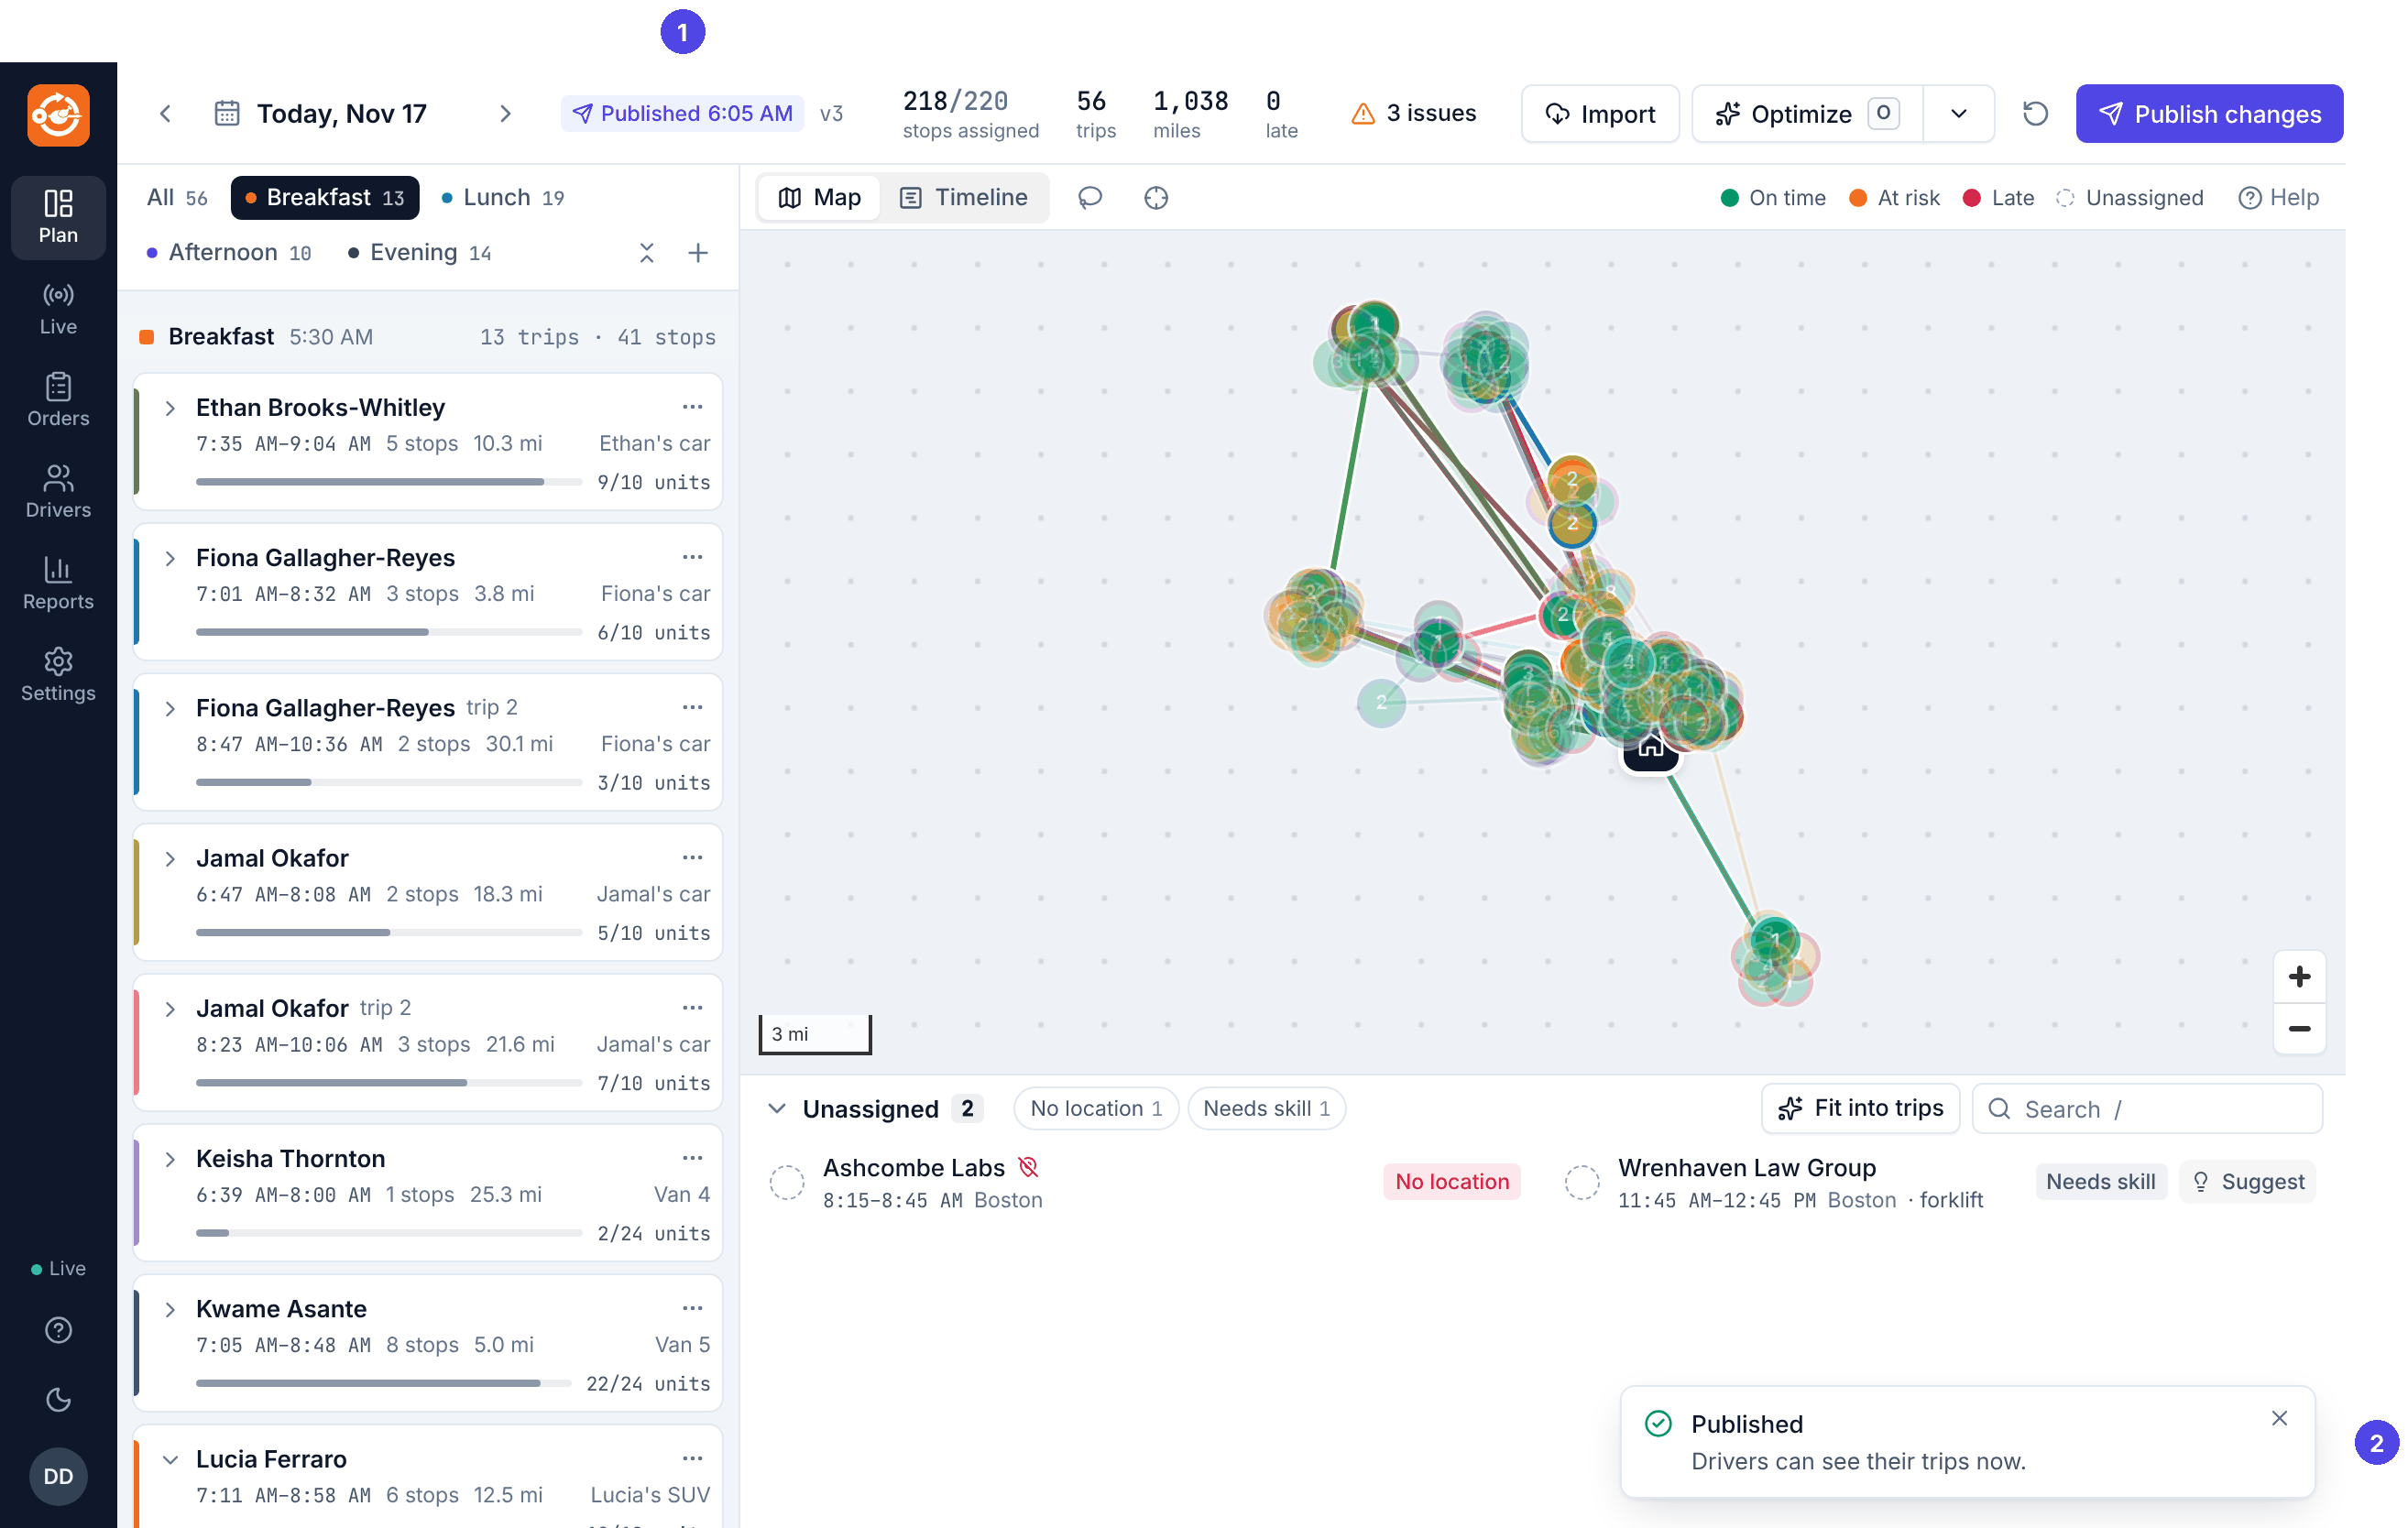
From now on, every change you make reaches the drivers at once. See Publishing and route sheets.
9. Watch the day on Live
Click Live in the left-hand bar.
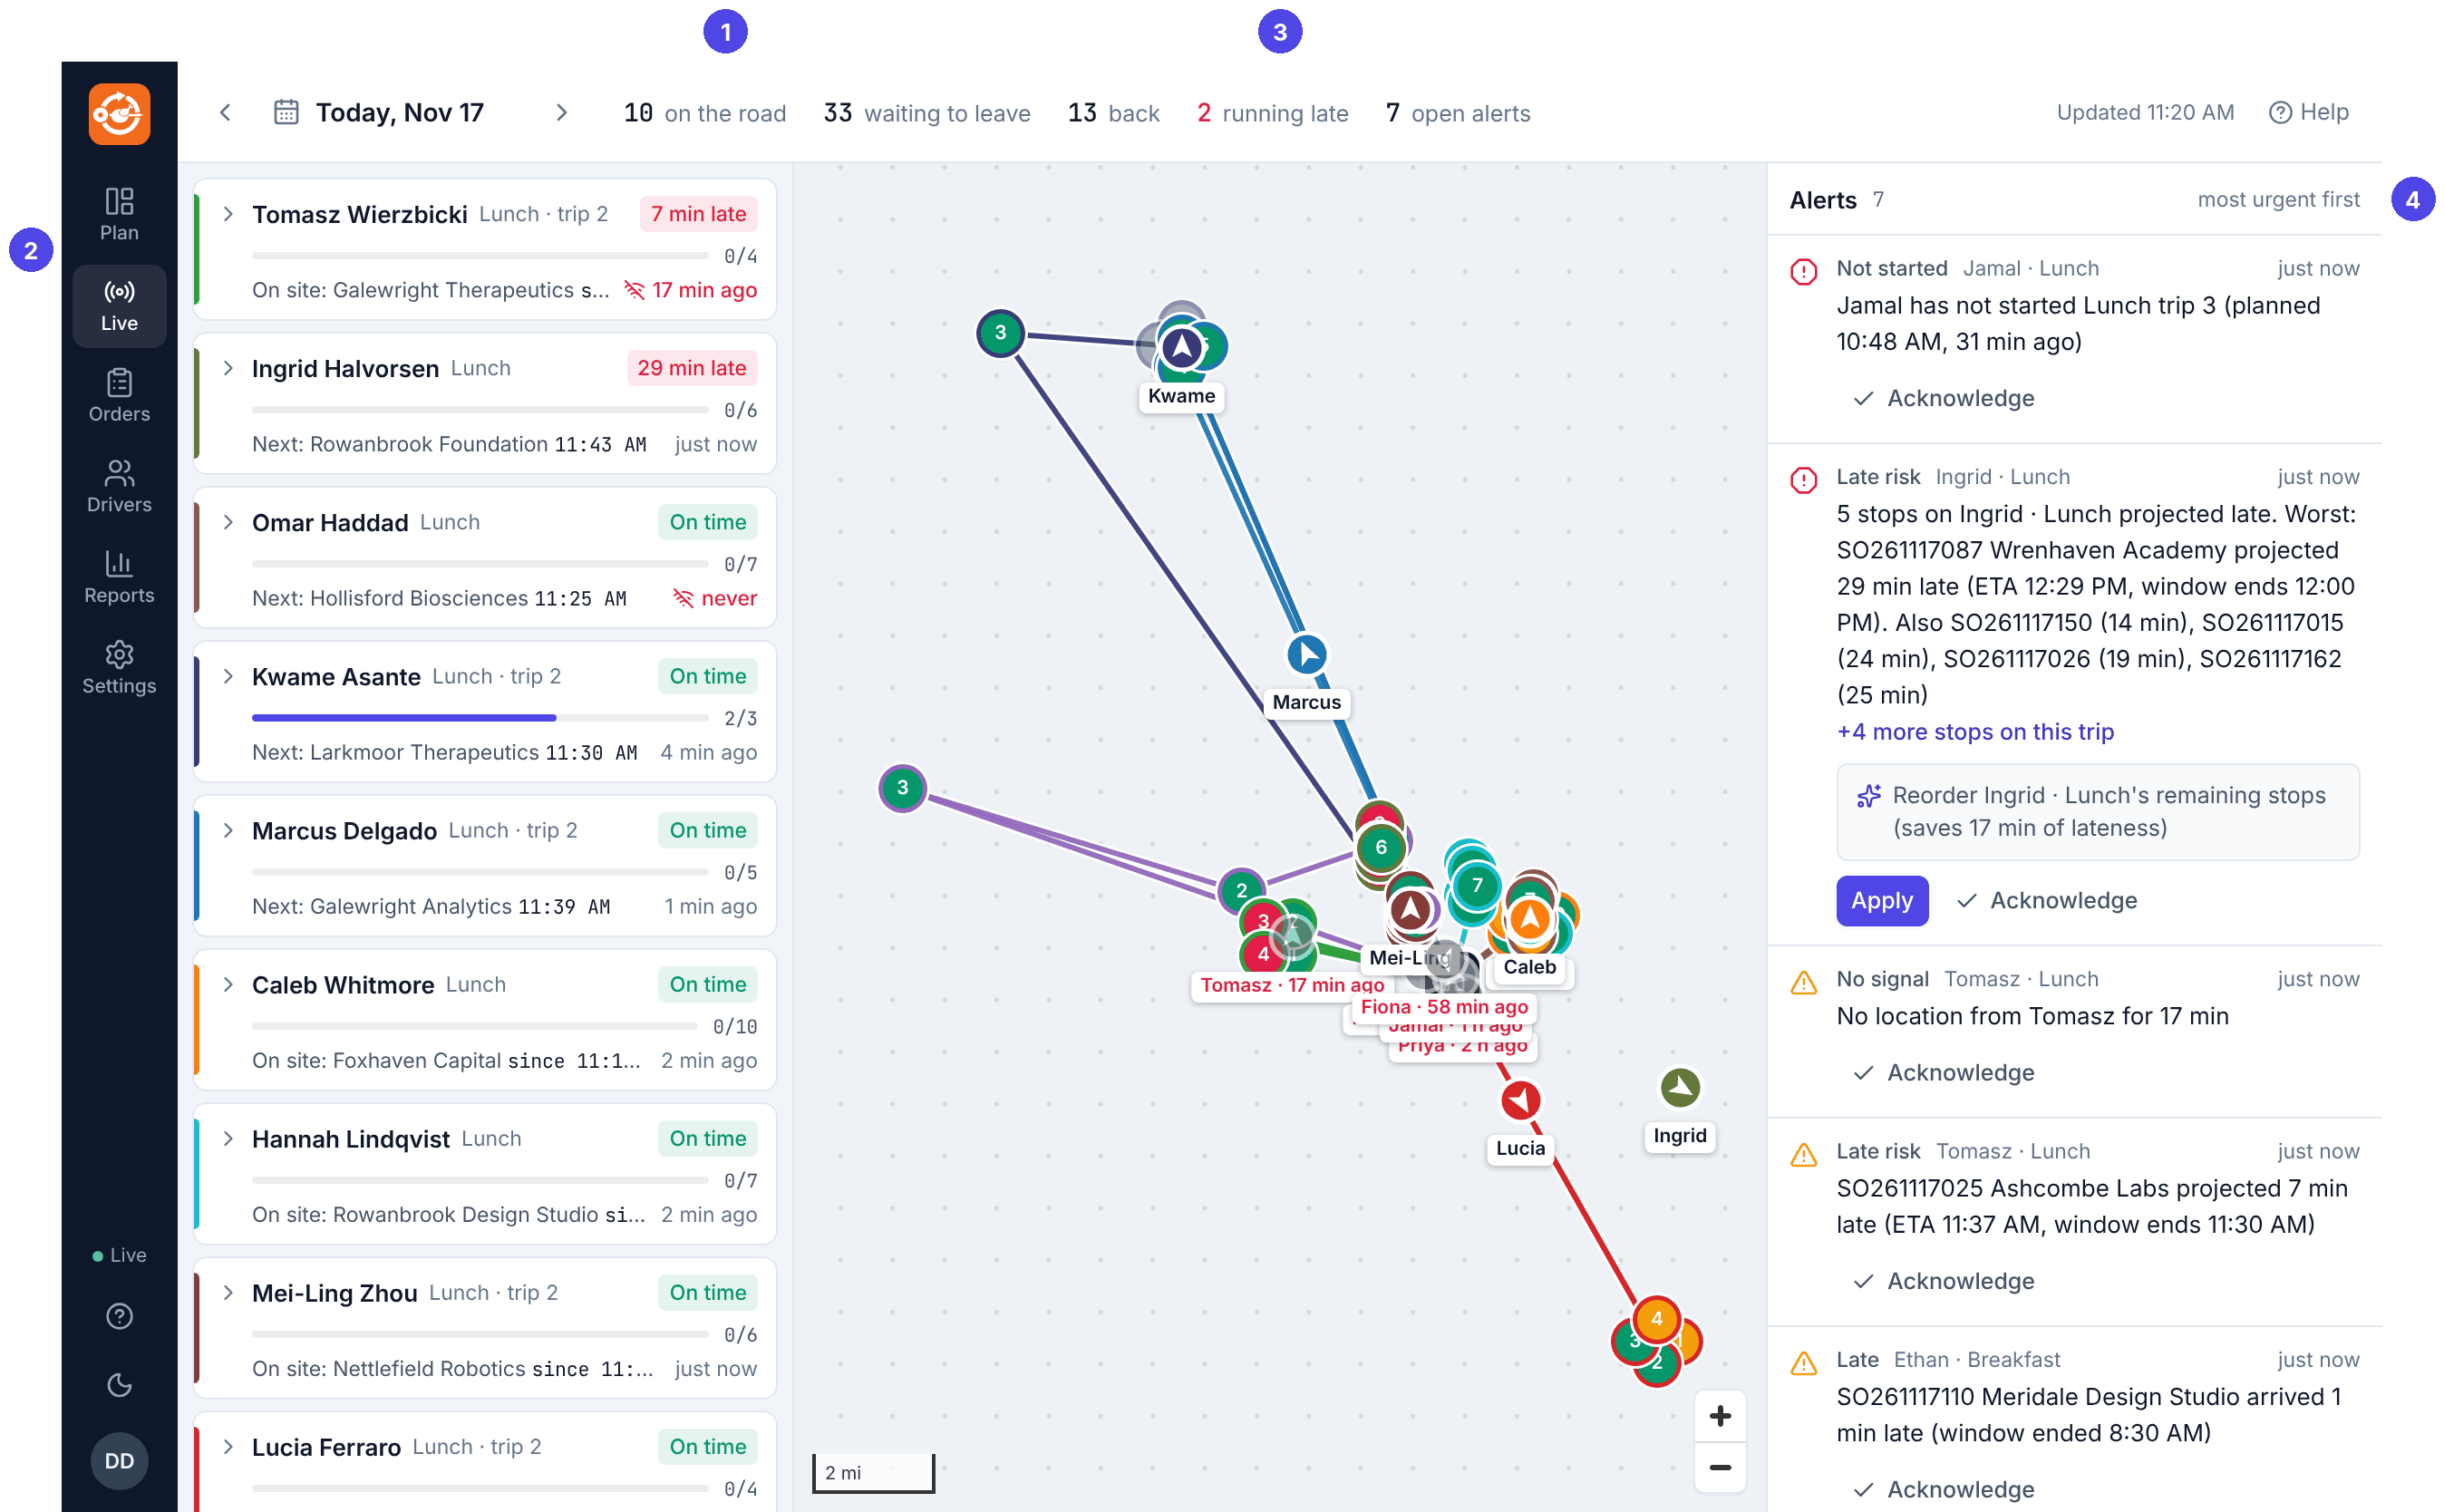
The alerts list is your to-do list for the rest of the day: a driver at risk of being late (often with a one-click fix), a phone that stopped reporting, a trip that has not left. Read The Live screen.
Printing this page
Use your browser's Print command. The menus and sidebars are left off the paper.